Costuming
Art Tutorials
100% Manga!
Draw Myth Creatures
Asian Calligraphy
Medieval Calligraphy
Egyptian Calligraphy
Silk Painting
Creative Writing

Here is an example of elaborate character costuming - this is Lolita Goth costuming, a popular style in Japan.

glstep1small.gif

Step 2: SKETCH THE BASIC OUTLINE
 
Now sketch the outline of the costume.  Do you want tall boots or ballet slippers?  A short skirt or a long one?  What about her hair - is it in ponytails or loose, braided or in a bun? 
 
Take your time deciding what outfit will look best.  Try looking online or in fashion magazines to get ideas.  After you have the basic outline, think about accessories.  In this example, I've accessorized her outfit with a ribbon choker, a beaded cross necklace, and striped leggings.

glstep3small.gif

Step 4: CLOTHING FOLDS
 
How do you make your costume look 3-D?  Look at this example to see how the skirt changes from a flat triangle shape (above) to a ruffled skirt (right).  You can draw a simple wavy line for the bottom of each skirt layer, then add vertical lines on each side of the curve to show the folding of the cloth.  If you then add short vertical lines under the fold as well, it really looks 3-D!

Step 5: SHADE IT!
 
Add any last details, and shade in your drawing.  In the example below, I just used the same pencil I drew with, to shade in the clothing.  Notice how I showed the shine of the boots by leaving a vertical stripe uncolored.  I also added stripes to the skirt by following the lines of the ruffles.

glstep5small.gif

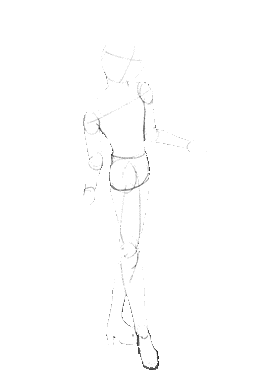
Step 1: SKETCH THE POSE
 
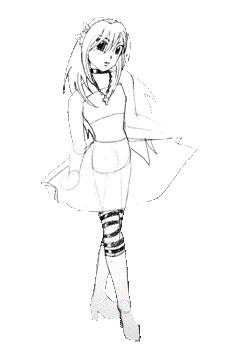
First select and sketch your character's pose.  With this clothing style, a *kawaii* (cute) pose is needed.  Spend some time on this!  This is the most important step - without good technique at this stage, your final character will be all wrong!!  Make a friend or family member pose for you, or look at photos to get ideas.
 
Make sure the head is not too big (it can be a little big since this is manga, but don't make it as wide or wider than the shoulders), and that the hands and feet are not too small.  Look in the mirror - if you hold your open hand next to your face, how big is it?  

glstep2small.gif

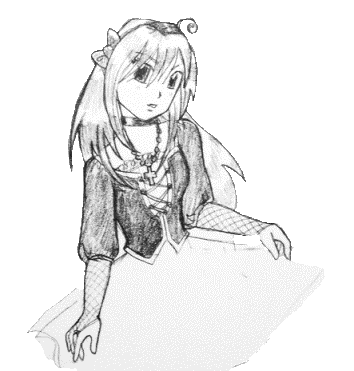
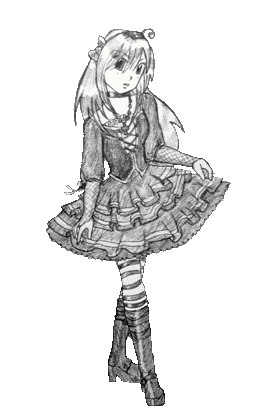
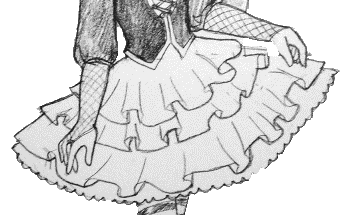
Step 3: ADD THE DETAILS 
 
Details make the drawing!  Here I've added fishnet gloves, puffy sleeves, and the details of the bodice.  This step is also a good place to STOP and check your drawing - flip the paper over and hold it up to the light to see that it has good proportions.  That way you can fix the eyes, or hair, or any other details that don't look correct when you see it reversed.
 
Once more - DETAILS MAKE THE DRAWING!  If you want to draw fishnet gloves, make the lines curve around the arm, don't just draw straight lines or X's.  If you want to draw a ruffled shirt, look closely at photos or at this example to see that the ruffles aren't just wavy lines, they have folds drawn in them.

glstep4small2.gif

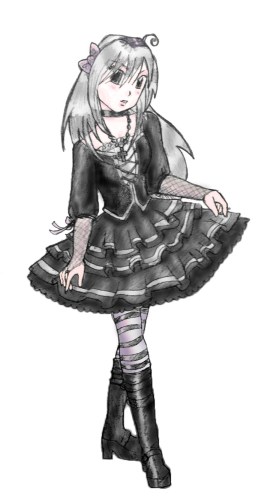
Step 6: COLOR IT! (optional)
 
If you like, you can now use colored pencil to add some pinks or darker greys and blacks to your drawing.  Don't use markers!  The pencil will smear.  To use markers, you have to trace your drawing with a waterproof pen, and erase the pencil lines.

lgoth2.jpg

Questions? Email Susan at uzushio@gmail.com