|

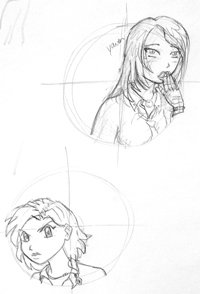
First sketch out the character you want to color on any paper. It doesn't matter
if you use a #2 school pencil on printer paper, or a 2B pencil on drawing paper - this is just a sketch to start. Here
(to the left) I have drawn two portraits.
Once you have drawn the character you want, erase extra pencil lines so you can easily
see the correct lines. Then you will need to lightly trace the character onto heavier paper - marker paper or manga
paper is best, to prevent the marker from spreading all over the page.
To trace, you can use a lightbox or just stack the marker paper on top of the sketch
paper and hold it up to a sunny window. Lightly trace only the lines you plan to ink in black - the pencil lines WILL
show through the marker color.

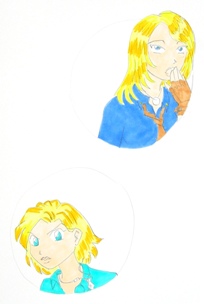
Now block in the basic colors. In this picture, I
used Copic markers Y11 (pale yellow) and Y19 (napoli yellow) for the hair, E50 (eggshell) for the face, and B23 (phthalo blue)
for the long-haired officer's shirt, with BG45 (nile blue) for the short-haired officer's shirt. I used the same blues
for their eyes. For the tie and glove, I used E55 (light camel).
I used small circular motions to fill in as much solid
color in an area as possible before moving on to a new area. But don't worry if the marker color looks a little
uneven - a little streakiness doesn't matter at this stage, since I will be adding more layers of color for shading
on top of this layer.

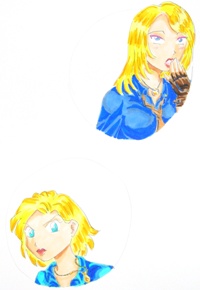
Use a darker color to add shading. For the skin I added E51 (milky white)
and E55 (light camel), as well as a little touch of RV02 (sugared almond pink) to outline the lips, eyelids, and fingers.
I added a brighter color to the top of the hair and the shirt collar buttons/necklace - Y06 (yellow), and a
darker color for the low lights of the hair - Y38 (honey).
I added C7 (cool gray No. 7) to the long-haired officer's shirt, tie, glove, necklace,
and eyes. For darker shading I added B28 (royal blue) to the shirt and tie, and E59 (walnut) to the glove. I also
sketched a few lines of B28 on the glove in the deepest part of the shadow.
I used B23 (phthalo blue) and B28 (royal blue) for the darker areas of the short-haired
officer's shirt.

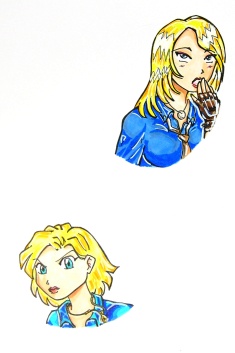
Finally, ink in your black lines. If you are using a water- and marker-proof
pen, you can do this step before coloring in anything. But, the safest way is to ink last. Then you can use any
black pen.
I used a Copic 0.7 black multiliner for this picture, and drew over the lines again
to make them thicker in some places. Then I outlined everything with a Bic permanent marker, and added white highlights
with a white Sharpie poster paint marker.
Just play around with the colors - markers are fun! Don't worry if you get streaky
or strange results at first. With practice, you can make great color illustrations!
Ganbatte kudasai! (Fight on!)
|

